- Overview
- Flex Label Templates
- Barcode Printing Preferences & Usage
- Label Template Design & Customization
- For Advanced Users
- Editing an EPL Label Template
- Deleting a Barcode Label Preferences & Templates
Overview
Your printer is connected to flex, and you’ve printed a label to ensure its functionality. Next you may want to customize that template, or possibly switch it out entirely. There are multiple ways to accomplish this, both within Flex and outside of Flex. (see Barcode Printer Setup for more information about setting up a barcode printer).
In May 2020, Flex was updated for new customers moving forward with new label templates, which we will refer to in this article. If you were a flex customer before May 2020, it is strongly recommended to perform the steps in the next section.
Flex Label Templates
Click here to download the Flex Label Templates (.zip)
The following files are included both as “.nlbl” files and text files. The “.nlbl” files are for use with Zebra’s ZebraDesigner Program for customization or editing. The text files can be opened, and their text copied directly into flex for use.
- 2x1 – Standard 2” Width, 1” Height label template with the standard barcode.
- 2x1 QR – Same as above, however this template prints a 2D QR code instead of a barcode.
- 2x05 – Standard 2” width, 0.5” height label with standard barcode
- 2x05 DB – Same as above, however this template prints a 2D Datamatrix code instead of a barcode
Your printer must have support for “ZPL” or “ZPL2” in order to make use of the new templates. Printers like the Zebra GK420 are compatible. Furthermore, you must have a scanner or imager capable of scanning QR and/or Datamatrix, these models are typically referred to as “2D” scanners
To load these templates, or any new templates into Flex:
- In Flex, click the Menu Icon, then click System Settings, then Printer Templates. Click the Plus Icon along the bottom for "New Printer Template".
- Enter a Name, Check off the Supported Printers for that template, then paste the contents of a template text file into the Template Text box.
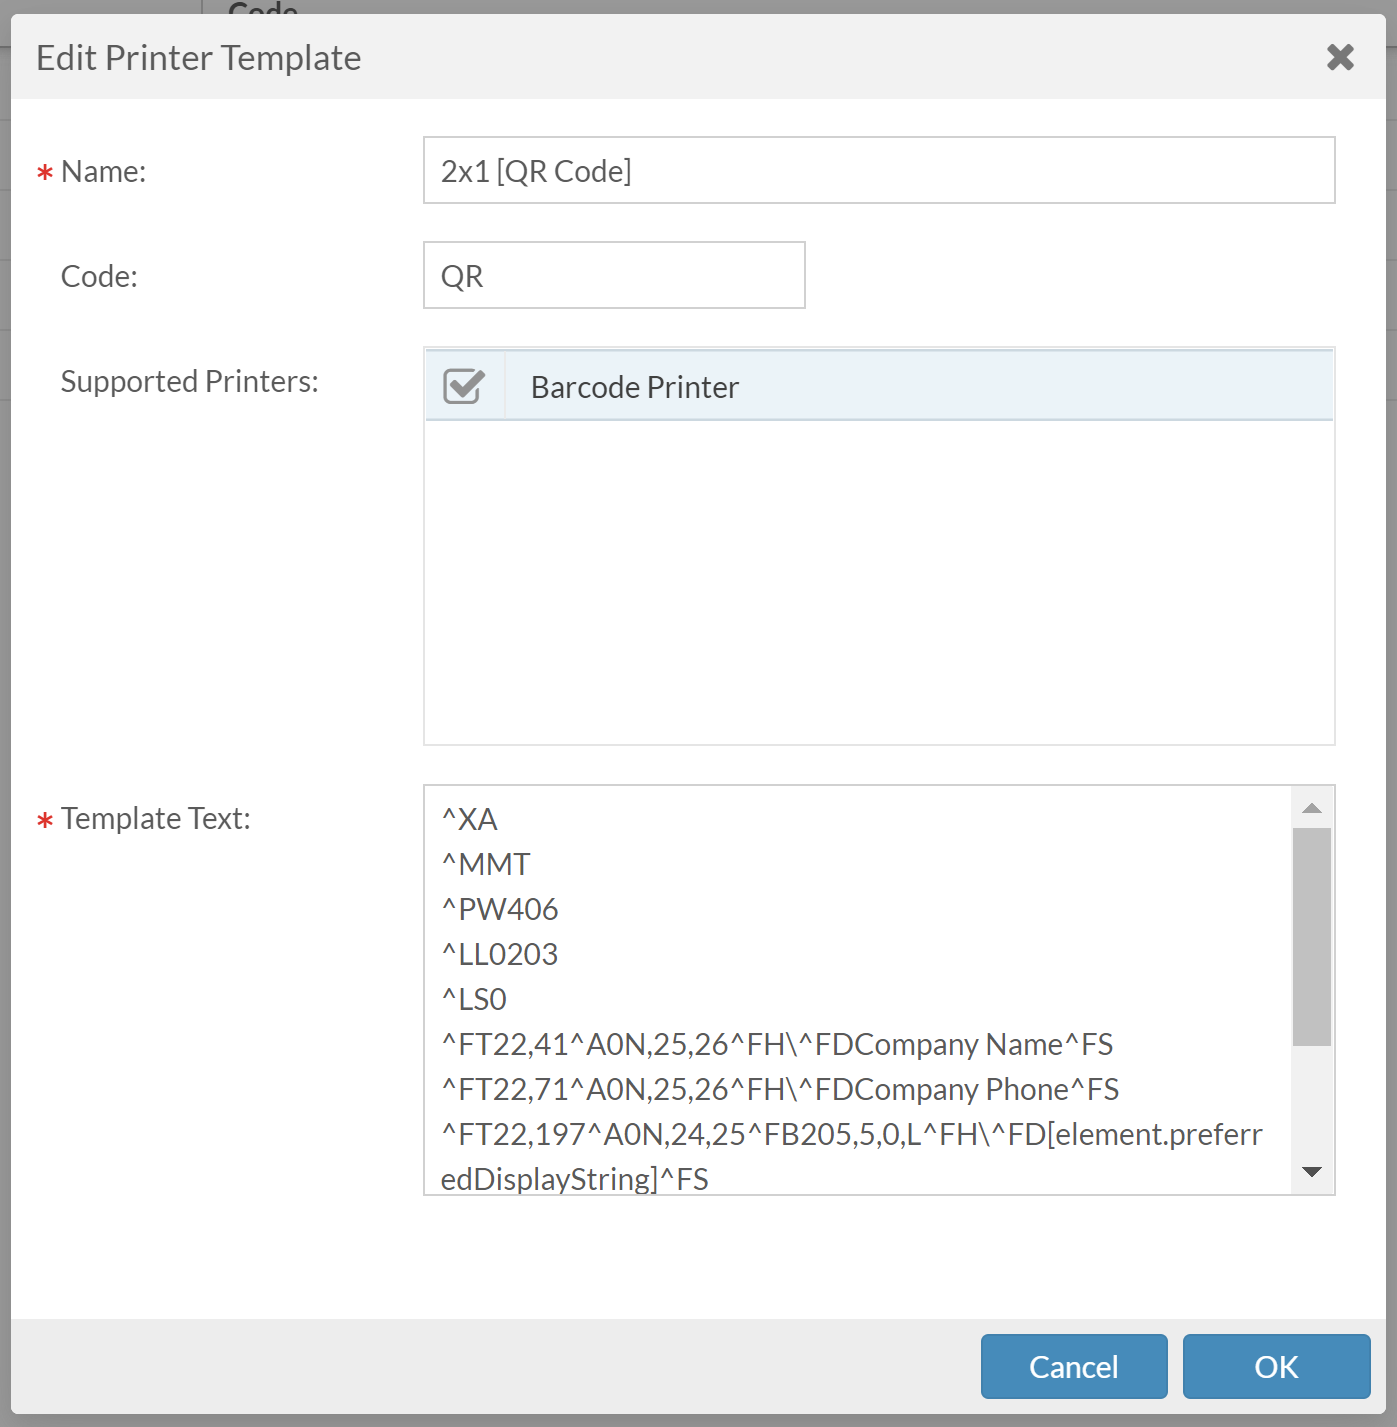
Before we click OK, we can make our first customization- as you can see, the sixth line contains the value for “Company Name” and the seventh contains a value for “Company Phone” - at this point we can enter our company name and phone number in those areas on the template now.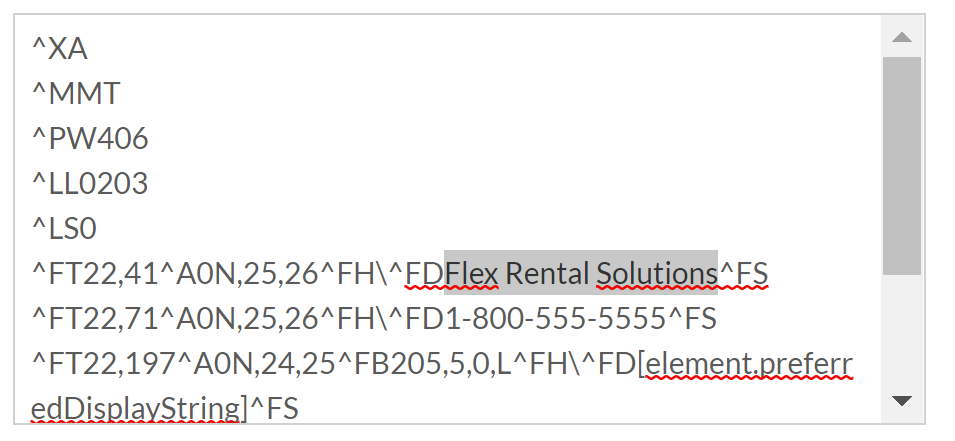
Ensure you do not delete the ^FD command before Company Name or Company Phone.
Barcode Printing Preferences & Usage
Perform these steps in order to print new or otherwise unlinked print templates, such as the 2D barcode templates.
First, we need to open a few things within Flex:
- Printer Templates - Click the Menu Icon, then click System Settings, then Printer Templates
- We may make changes to templates, this ensures easy access
- Barcode Printing Preferences - Click the Menu Icon, then click System Settings, then Barcode Printing Preferences
- So that we can quickly assign our templates to printer(s)
- An inventory item you would like to print a label for
- So we can quickly test our configurations
First and foremost, you may notice that you have more templates available on the Printer Templates page than you have preferences on the Barcode Printing Preferences page. Once a template has been entered on the Printer Templates page, it requires a matching reference on the Barcode Printing Preferences page, in order to be available as an option to print:
- Once you have entered your template on the Printer Template page, open the Barcode Printing Preferences page, and click the Plus Icon along the bottom for "New Barcode Printing Preference".
- From the Template drop-down, select the template you would like the ability to print, as well as the Printer that template will print on. Location does not affect functionality, but acts as a way to label where it will be printed in systems with multiple locations. Click OK.
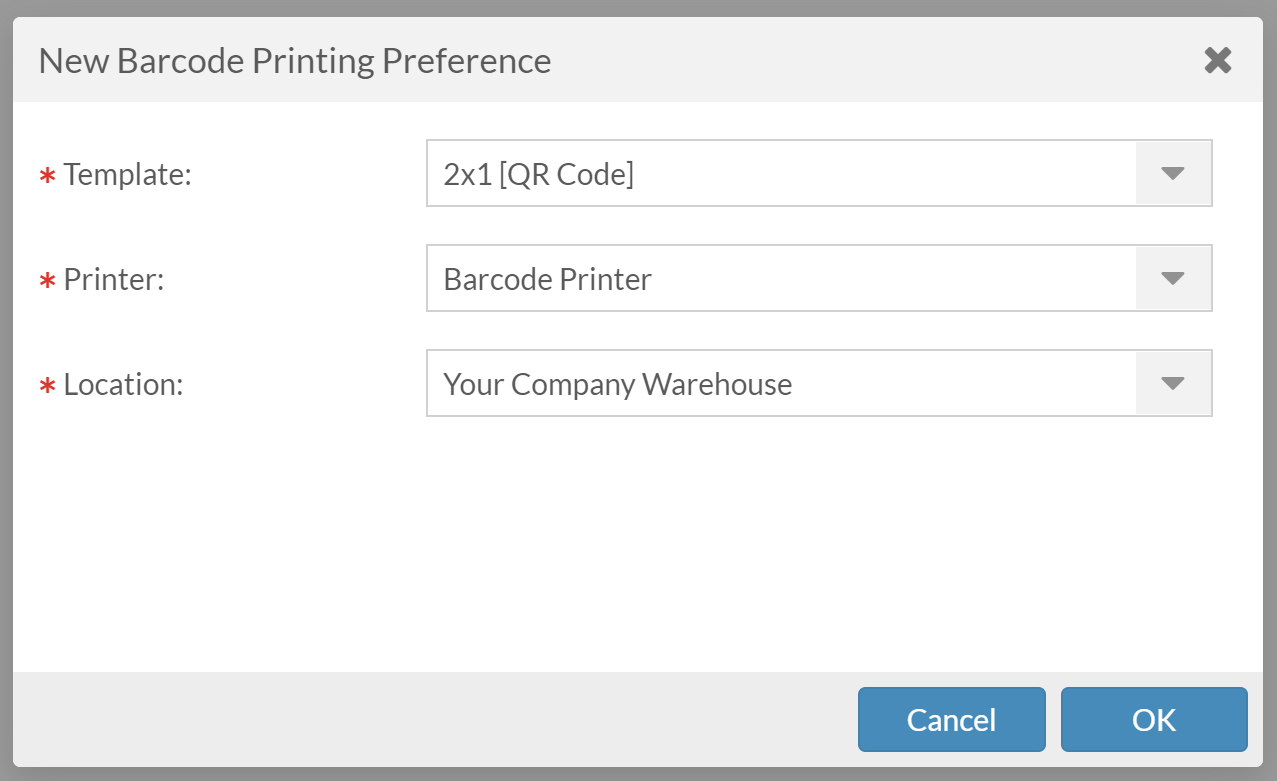
You can now try printing your new template- for step-by-step instructions, see the next section.
Note: If you’ve gotten this far but have been unable to successfully print- this may be a good time to possibly retrace your steps to ensure that you have not missed a portion of this process.
Repeat this process for every subsequent template you add to Flex.
Label Template Design & Customization
This section is regarding ZPL Language and ZPL templates - For more information on EPL language or EPL Templates, see Editing an EPL Label Template. If the only template in your system is "2x1" then it is most likely EPL. While EPL is similar to ZPL, it is a legacy print language, with minimal support for images and advanced barcode types.
There are several methodologies to designing and customizing templates for label printing with Flex. This section will cover customizing and editing the templates provided by Flex, with additional resources at the end of this article for those who would like to custom design a template.
ZebraDesigner
Currently only Windows is supported by ZebraDesigner. A direct paid alternative for Mac users is Labeller from Peninsula Group. While there is a free version of this software, it does not include enough features for our purposes. Mac users can still use Labelary
Furthermore, for our purposes, we will only need ZebraDesigner Essentials, the free version of the software, and can ignore trials and upgrades to the paid version of the software. ZebraDesigner runs on nearly any modern PC.
As we will detail, the objective here is not to install our actual printer on our computer - although this is still possible, it is not necessary to our purposes.
If you wish to connect your printer to your computer, Refer to your printer's documentation for more details - changes you make to your printer on your computer can affect its behavior with Flex!
ZebraDesigner - Download & Install
Download and install ZebraDesigner from Zebra Technologies’ website. Open the installer and follow the instructions to perform a typical installation of the software.
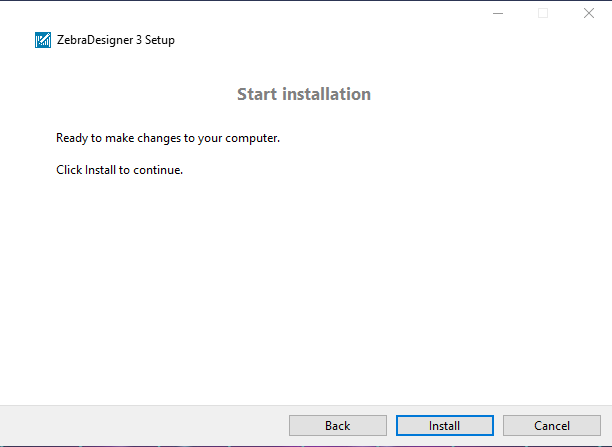
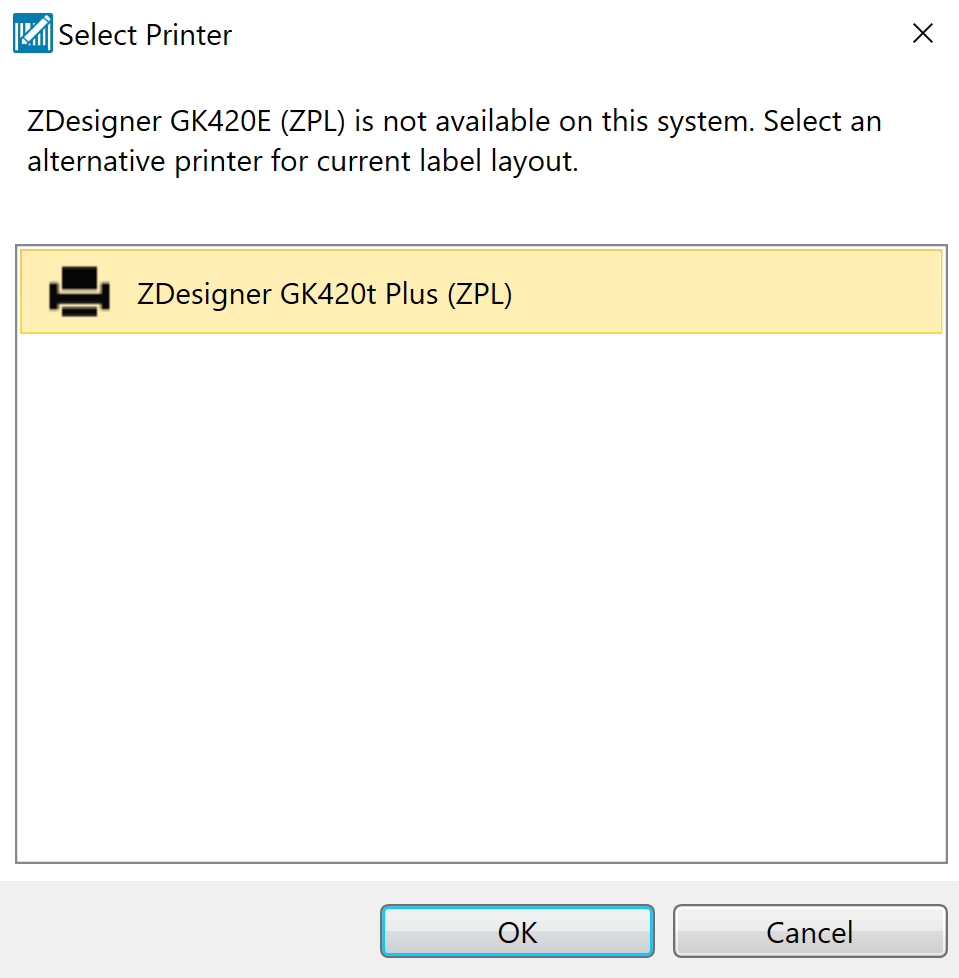
Once you install ZebraDesigner, open the program. When you attempt to create a new label or open an existing one, you will see this dialog box if you do not already have a Zebra printer installed on your computer.
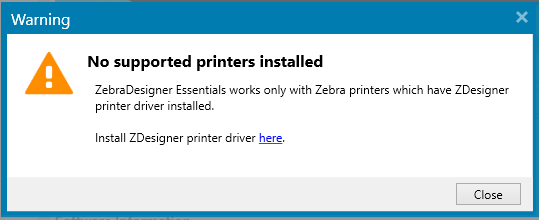
To install a printer, we will need the Zebra Support Utility (ZSU), available from Zebra’s website.
Download and open the installer - click through the prompts and you will be guided through adding a printer.
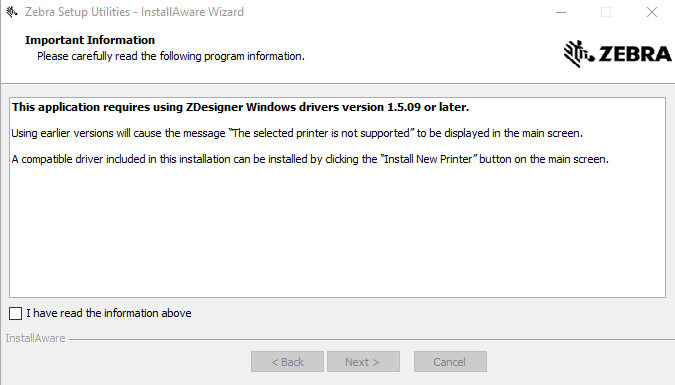
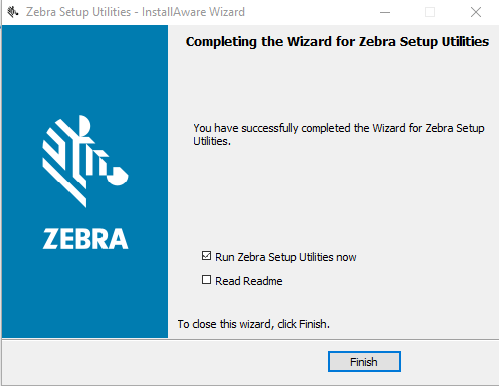
Once the installer completes, ensure that "Run Zebra Setup Utilities Now" is checked.
If given the option, do not choose USB for printer connection.
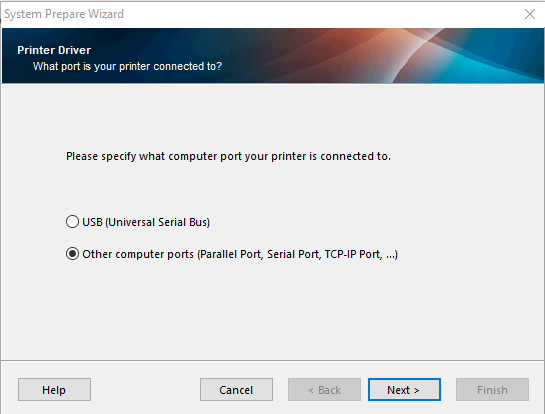
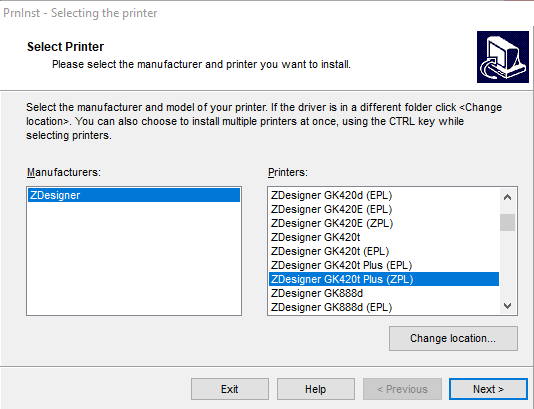
Click “Install Printer” and on the next screen, select your printer from the list of available drivers. Ensure the driver you pick is a ZPL version. Since we are not connecting our printer, the driver we pick does not matter, but you should choose the driver that either matches or closely matches your printer, and is a ZPL driver.
If you are installing your actual printer, choose the most exact driver available. Do not install an EPL driver.
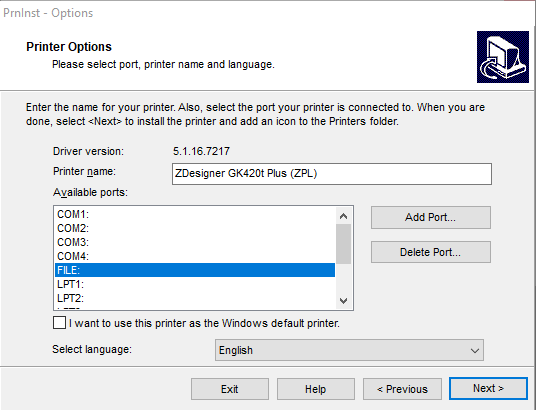
When asked for a port, simply select "FILE:" and click Next.
If you are installing your actual printer, click “Add Port” then enter your printer’s Local IP Address in both blank fields and confirm the port number.
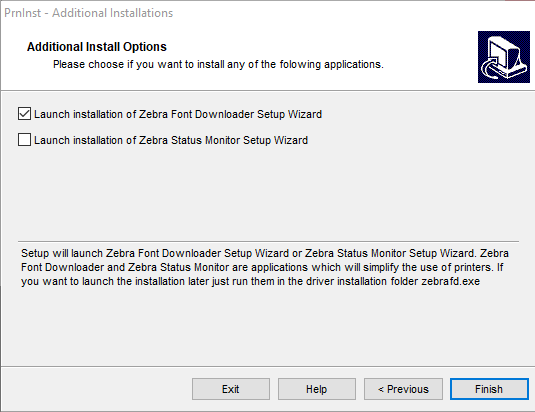
All set! At this point, you can launch a wizard that will download the built-in printer fonts for use with zebra. You must run the font downloader wizard for best results. Installing the status monitor is optional, and not necessary if you have not installed your actual printer.
You're all set to use ZebraDesigner! Let's edit the 2x1 QR template.
ZebraDesigner - Usage
To edit the 2x1 QR template, we will open the .LBL file in ZebraDesigner. This is the only way to edit a template after it has been created, as ZebraDesigner cannot open templates once they are converted to text.
Opening up an .LBL file, we may see a warning dialogue. In most cases, this can be ignored (Click “OK”) - you will only experience an issue editing the template if your printer is incompatible with some part of the label content (highly unlikely)
Once the label is opened, we see a very straightforward user interface. Buttons on the top bar can be used to save and open files, group and align objects, and buttons on the left allow us to add new elements. Selected elements can be modified in the properties panel on the right.
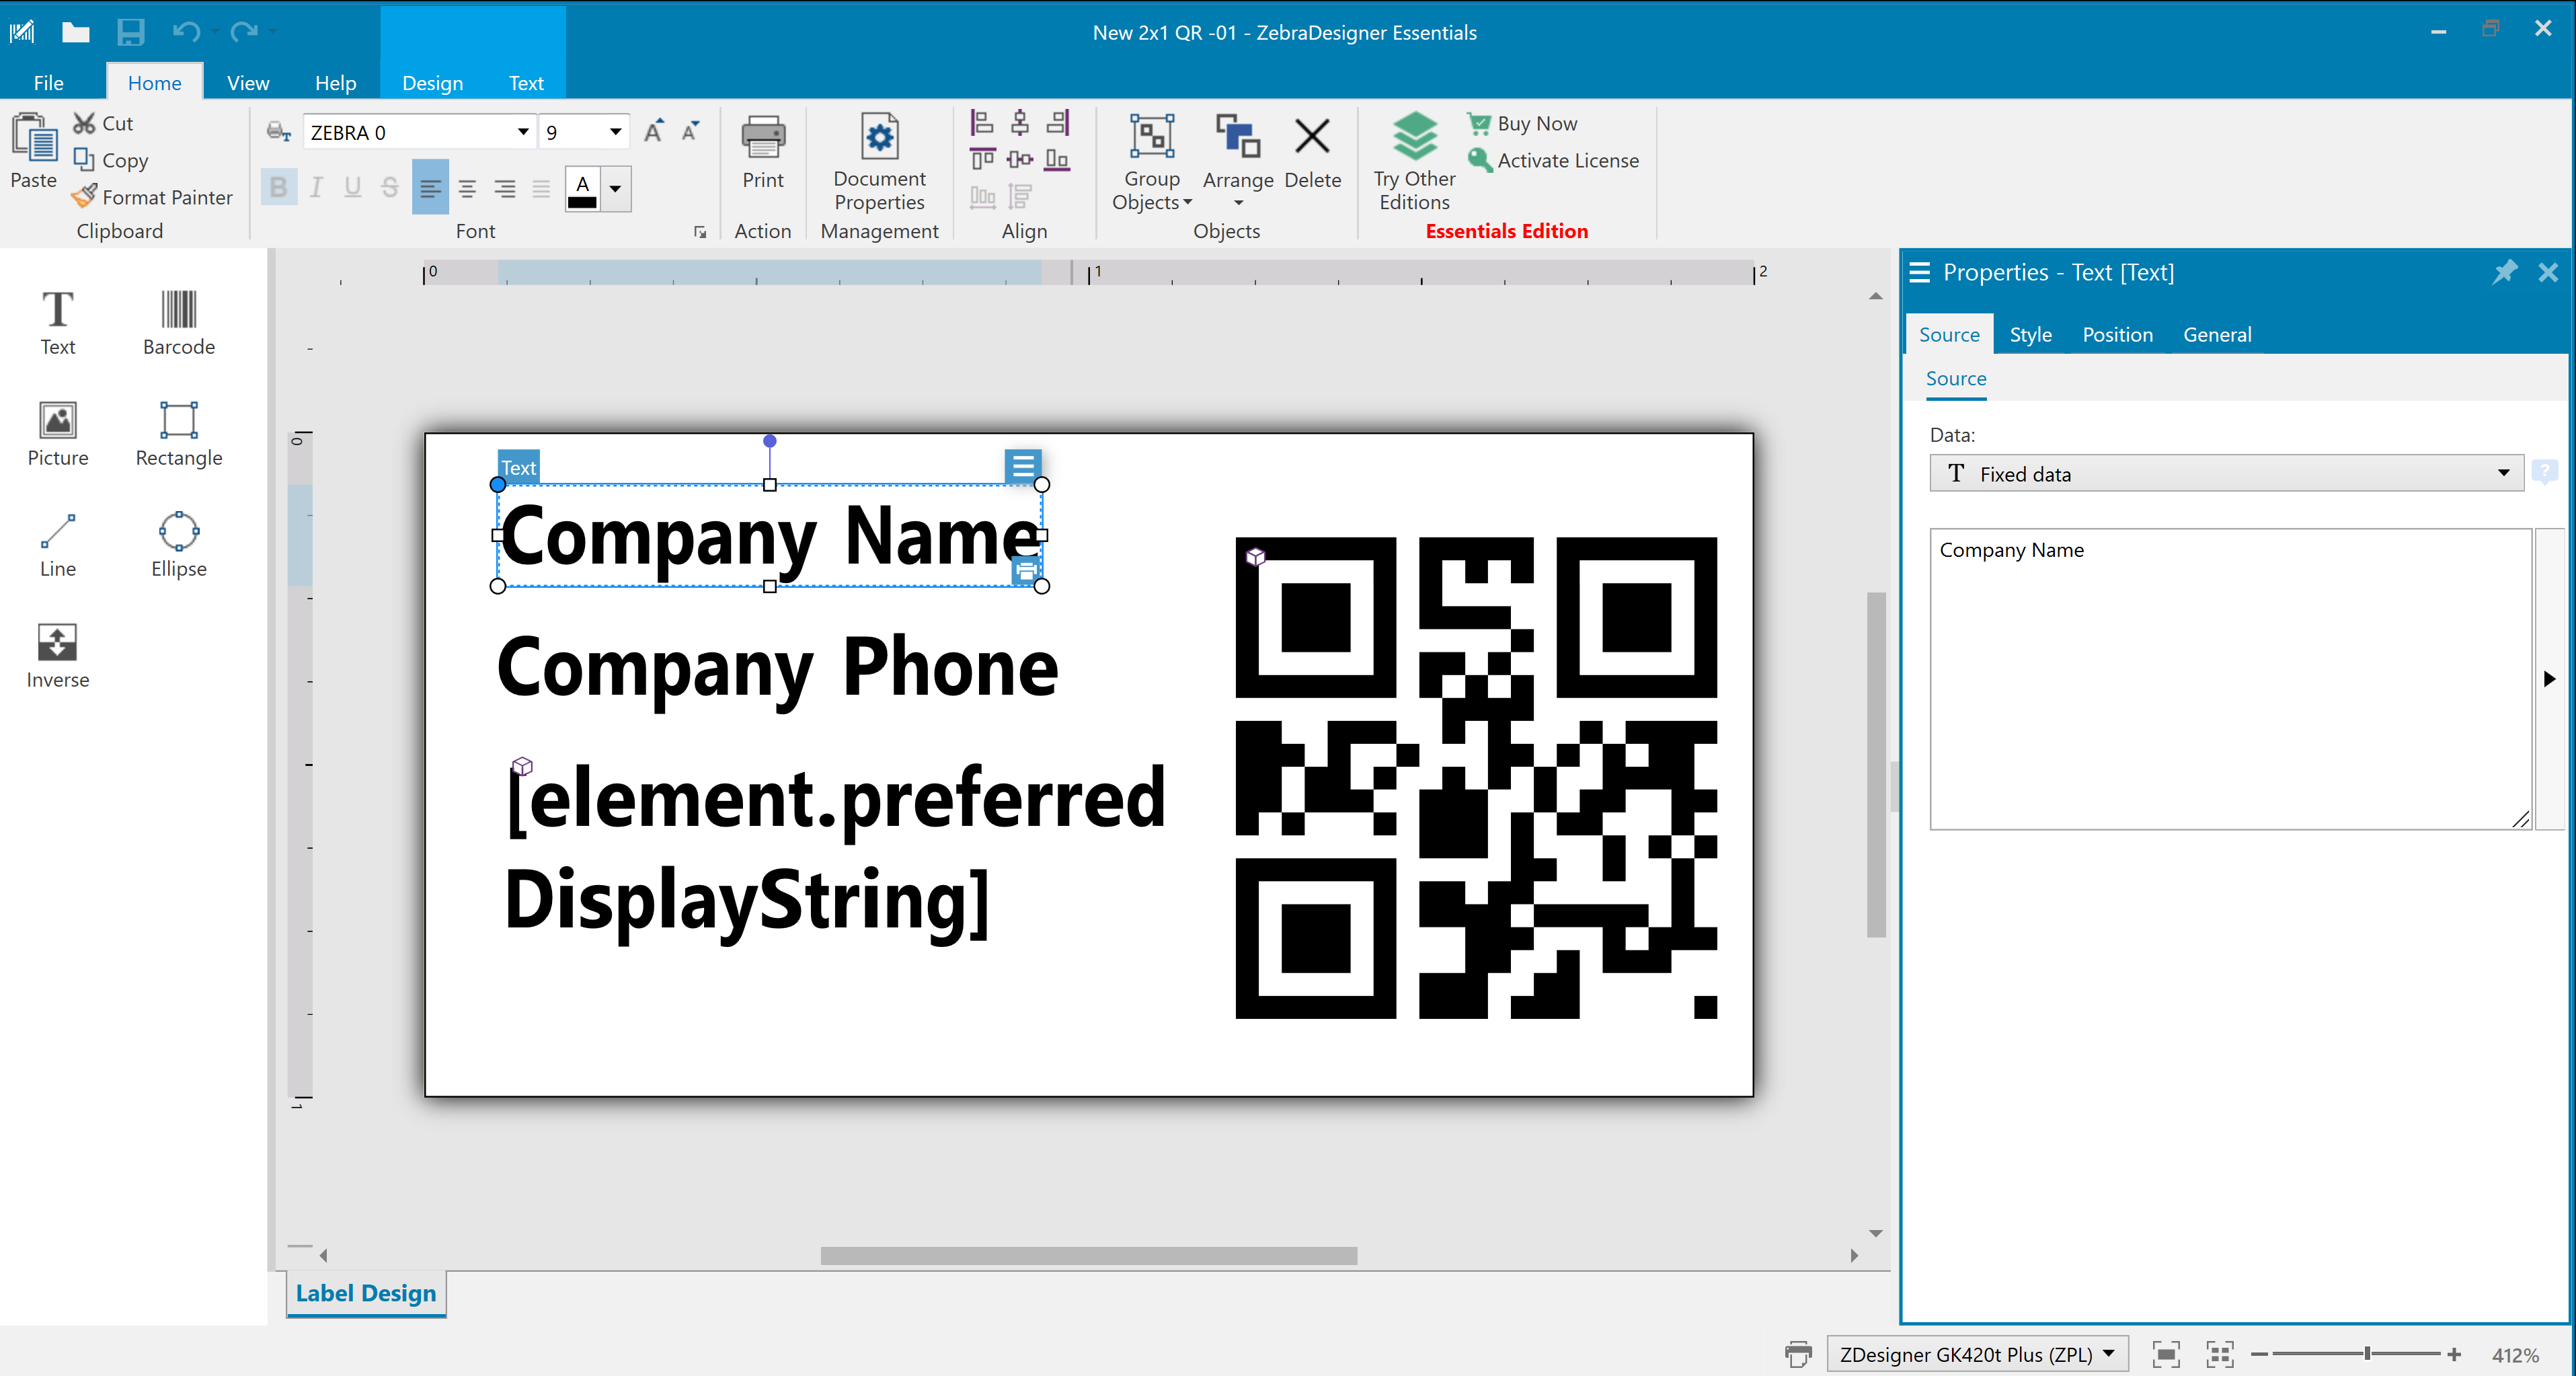
We can click and drag elements to move them around, and add things like text, barcodes, lines, shapes, and images if we like. For best results use bold simple graphics on a white background, but most graphics on a white background will work just fine.
For best results, single color PNG files with transparency work well- use dithering to simulate colors. ZebraDesigner will attempt to do this for you with any image, but is sometimes unreliable.
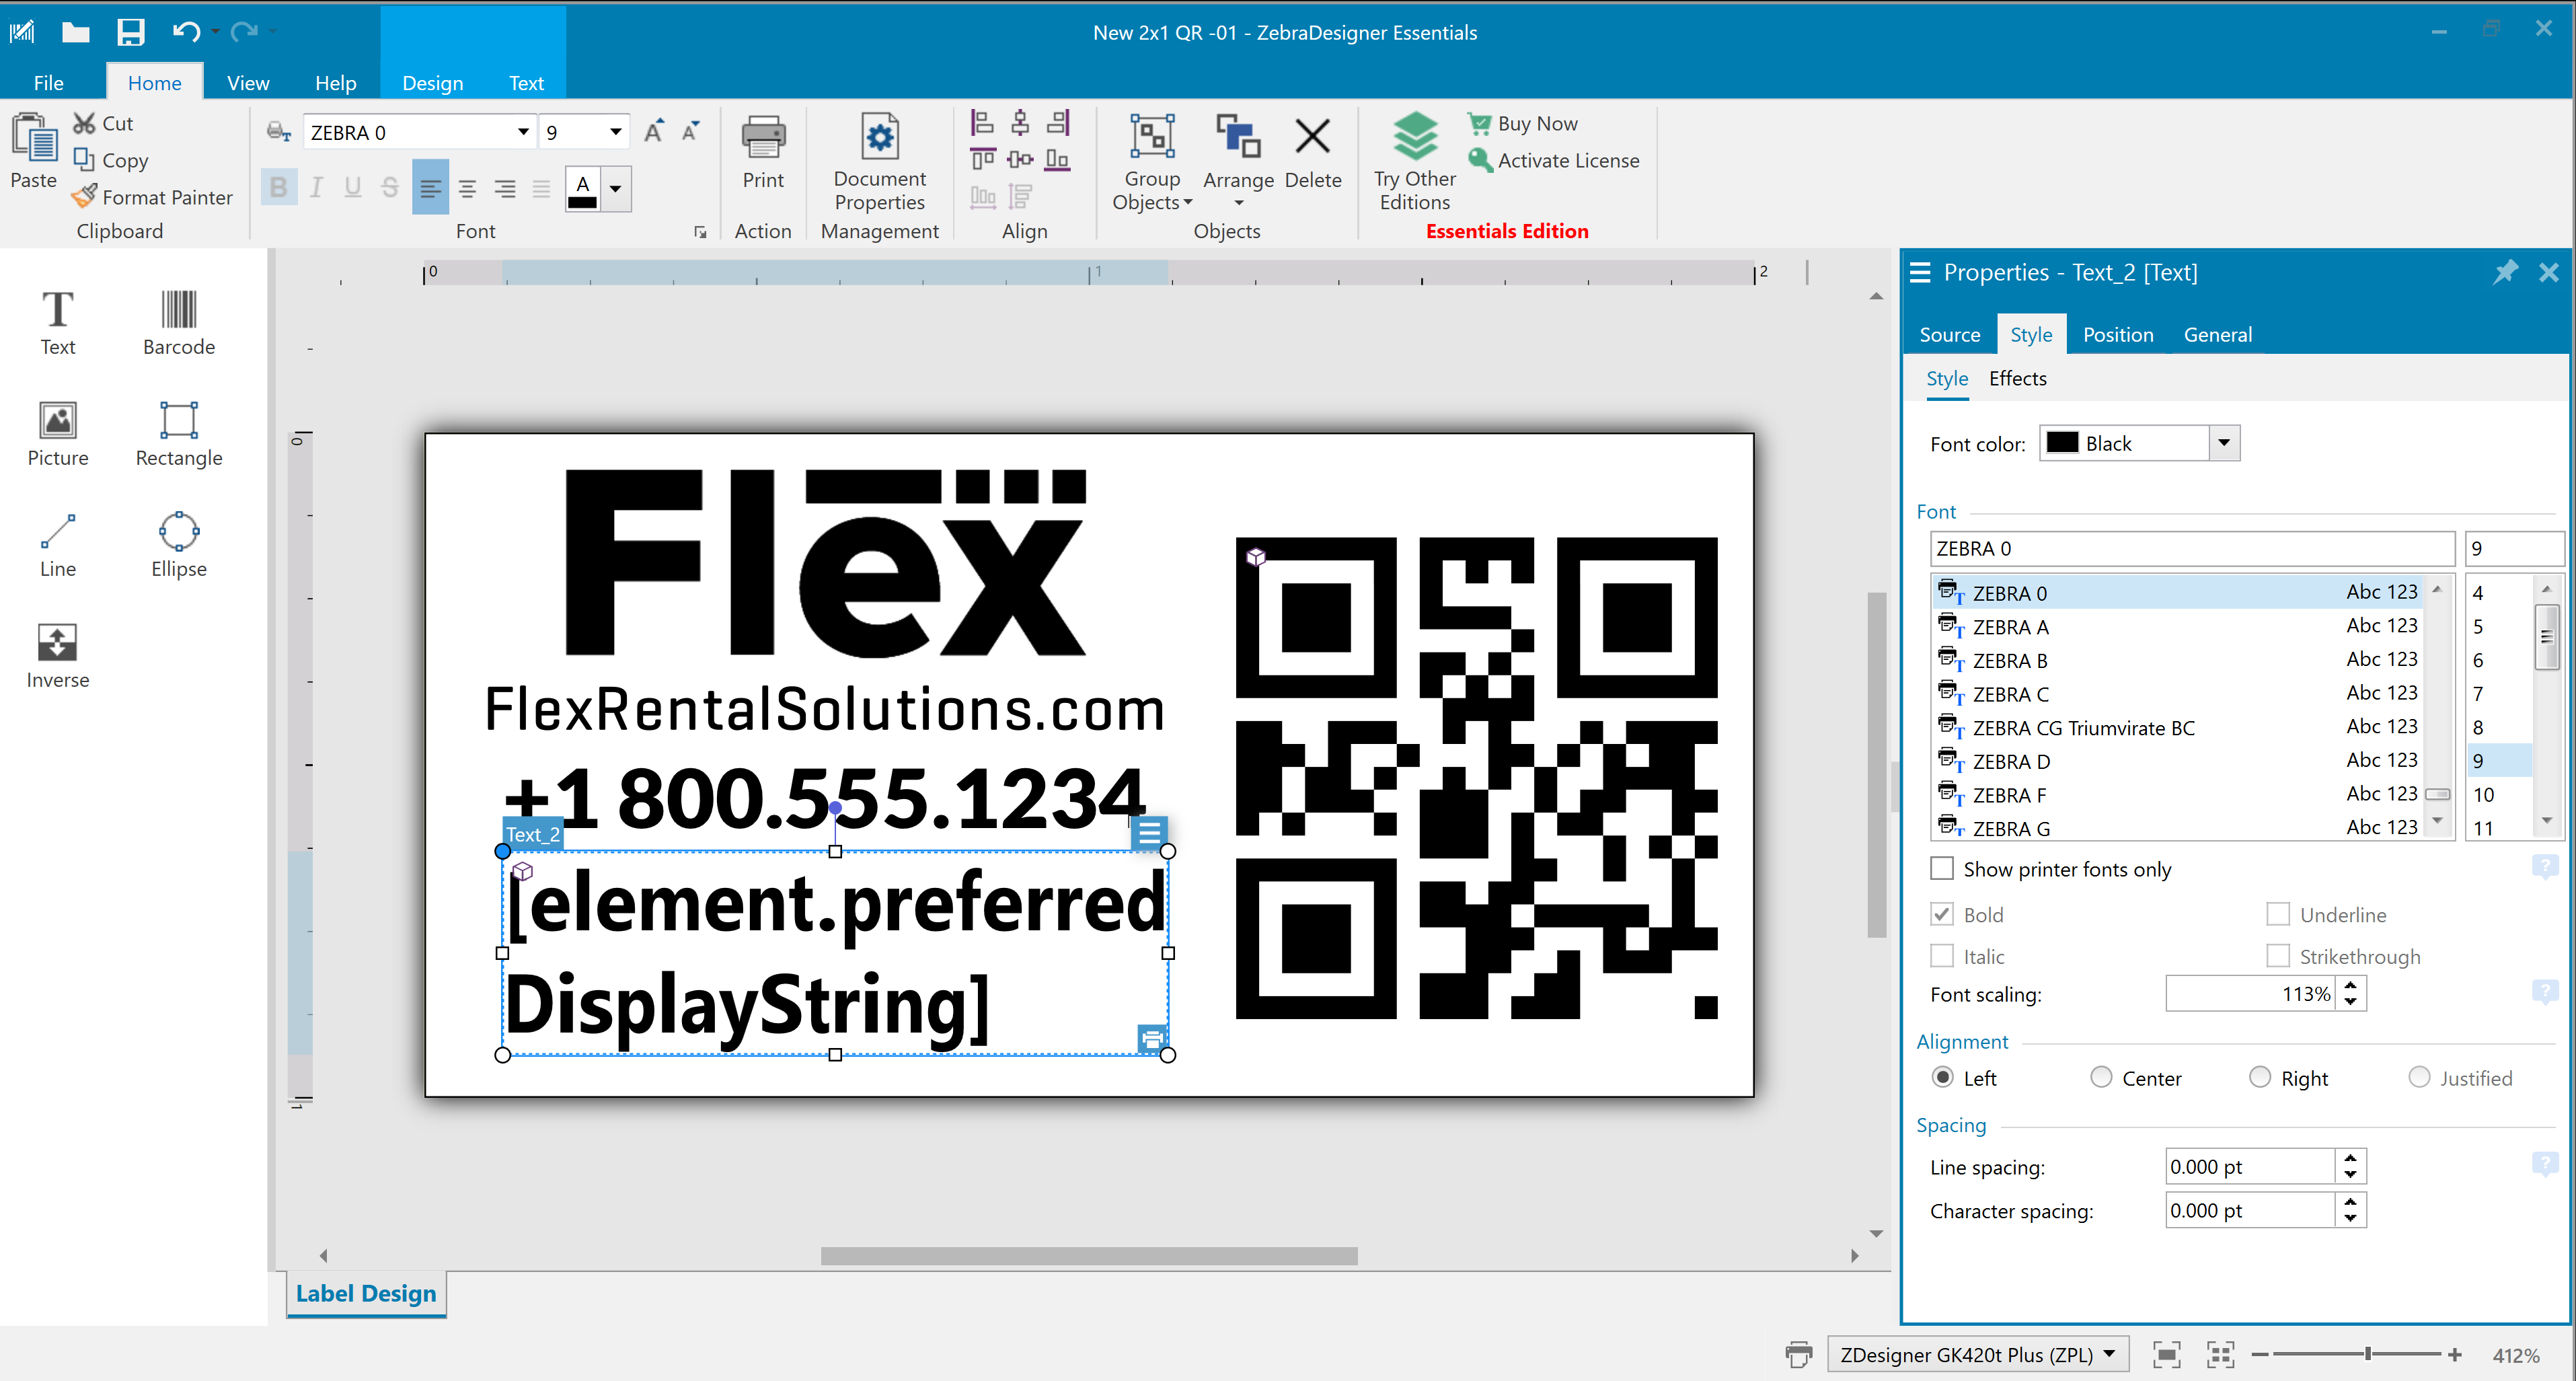
You can change fonts to virtually anything you want, with one exception: fonts for variable elements, like the token that places an item name on a label, must be one of the included Zebra fonts to function properly.
It is also important to note that information represented by a non-zebra font must always be changed in ZebraDesigner. Information represented in a zebra font can be edited in Flex, as we previously showed.
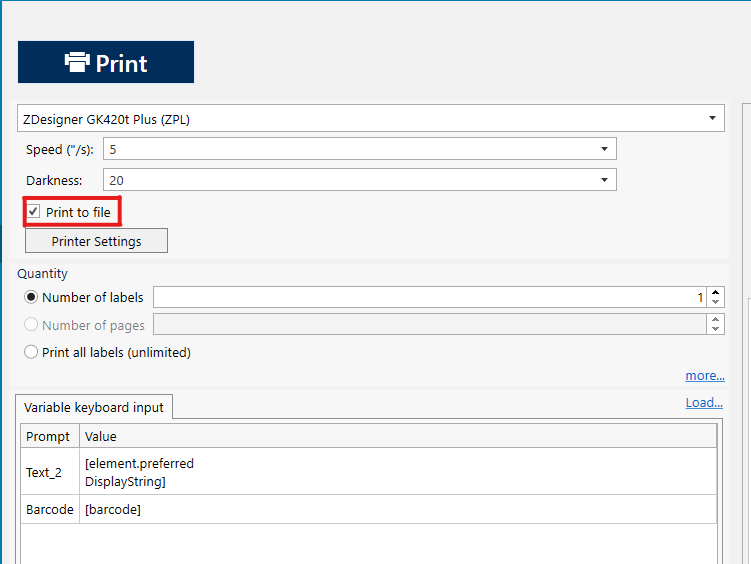
Now that we’ve made some changes, save the file, or save as a new file, then click Print. Make sure that Print to file is checked.
Now we should have two files, an .LBL file, and a .PRN text file. We need the .LBL to make changes in ZebraDesigner, and the .PRN has the text we can use in Flex. If we open the PRN in Notepad, we can see things like the logo and custom fonts are represented by strings of characters.
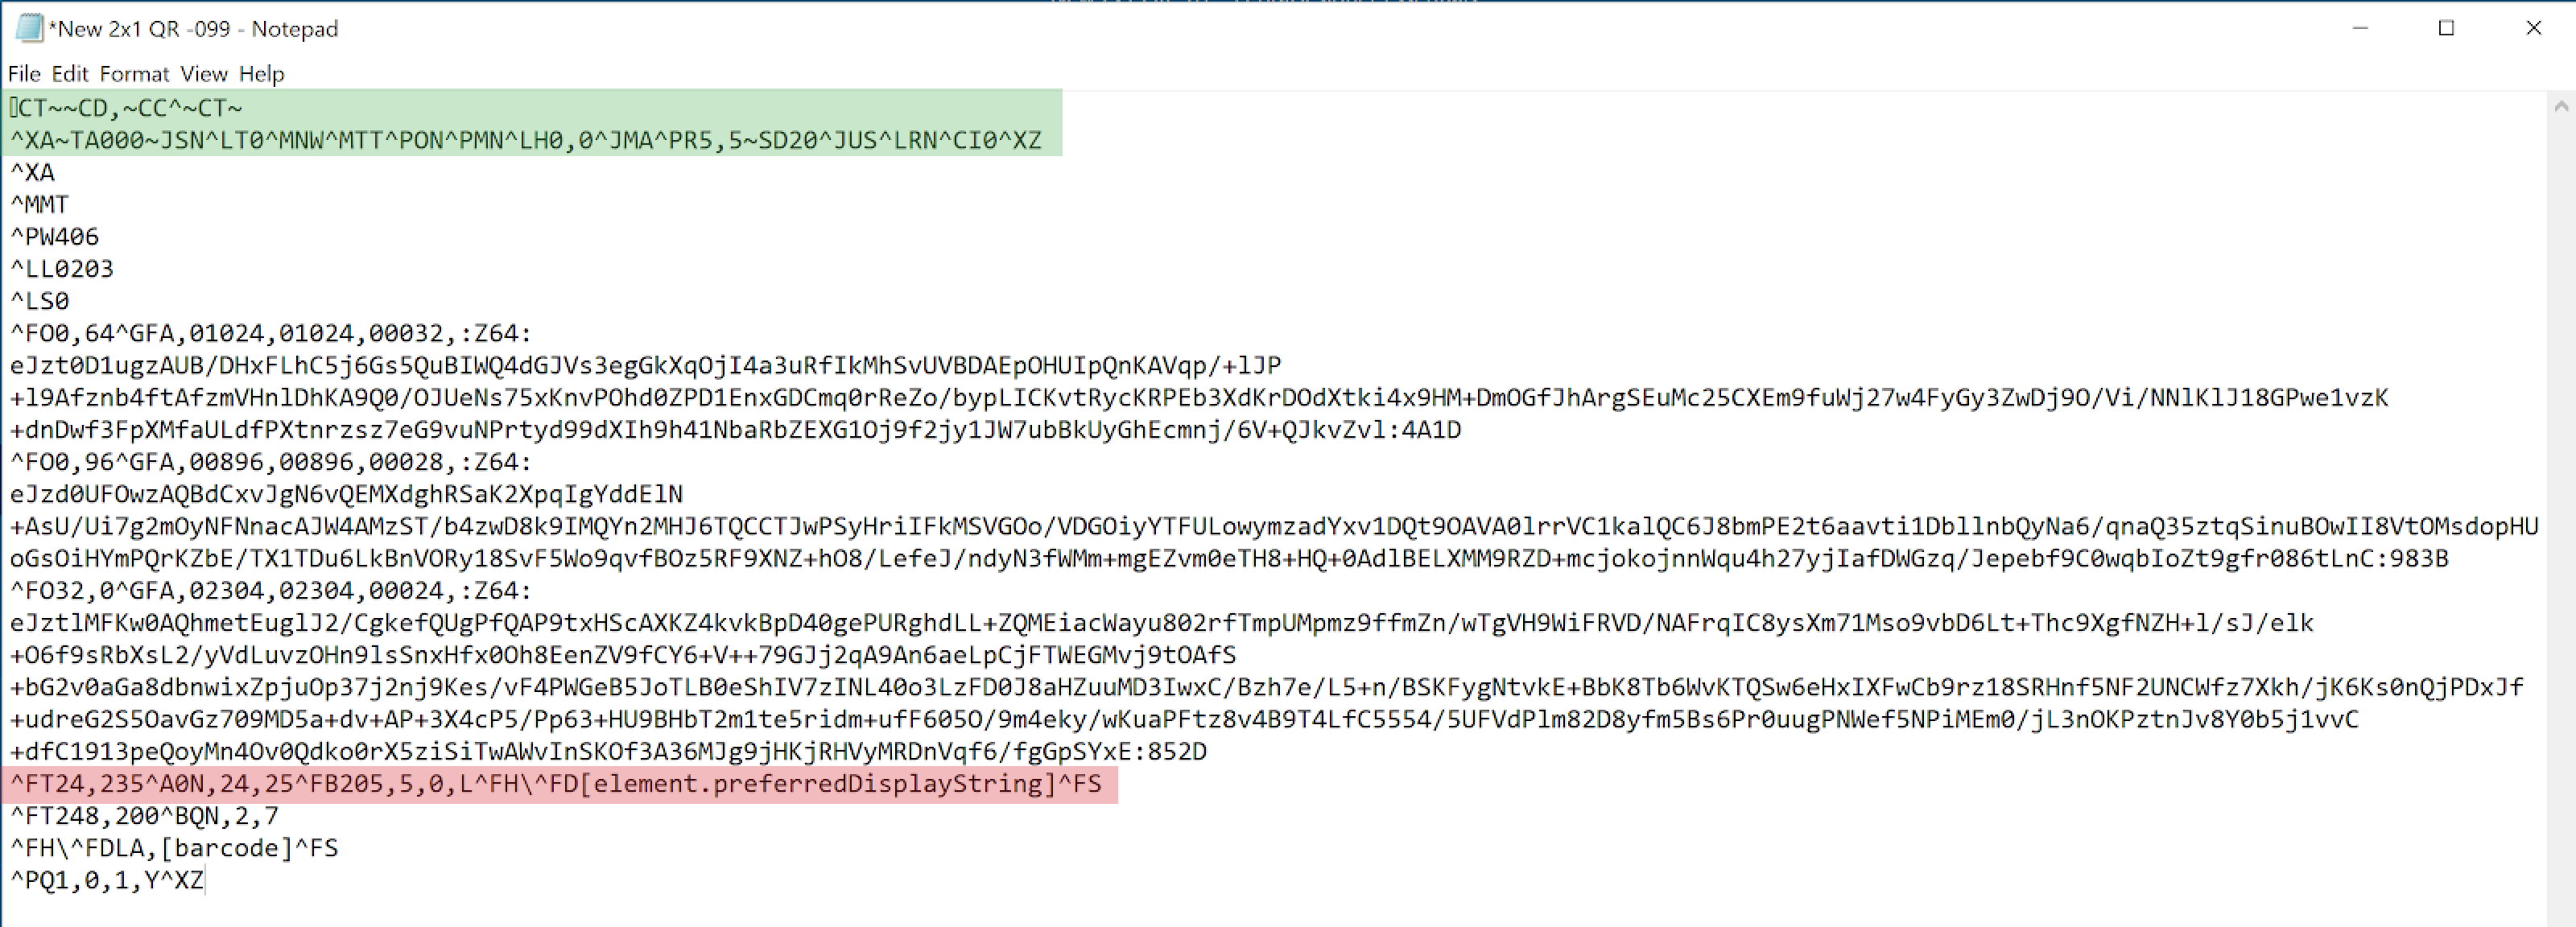
The green-highlighted section is the header- this information is already set on the printer, so this portion can be deleted for faster prints.
Some parts of the template may not be the same after the export. The red-highlighted section is an area that you may have to reference from the original template file.
Now, we can open the Raw Print Template in flex that we have made changes to, and upload the text we produced in the new file.
Once you have uploaded the new template, try a test print. If something isn’t aligned right, adjust it in ZebraDesigner relative to its position on the printed label- don’t worry if it doesn’t look right on the computer. Repeat this process until you are happy with the results!
Labelary
It is recommended that you reference the ZPL programming guide for use with Labelary. A link to download is available here (PDF)
Labelary is a web-based ZPL label viewer and simple editor which we can use to see how our print templates will look when printed with Flex.
As with ZebraDesiger, however, it is important to note that you should adjust elements on the label relative to how they print, rather than how they appear in relation to the virtual label on-screen.
Head over to Labelary.com and click “Label Viewer” or Click this link. The viewer will load with a default label design with some helpful comments explaining how ZPL commands work.
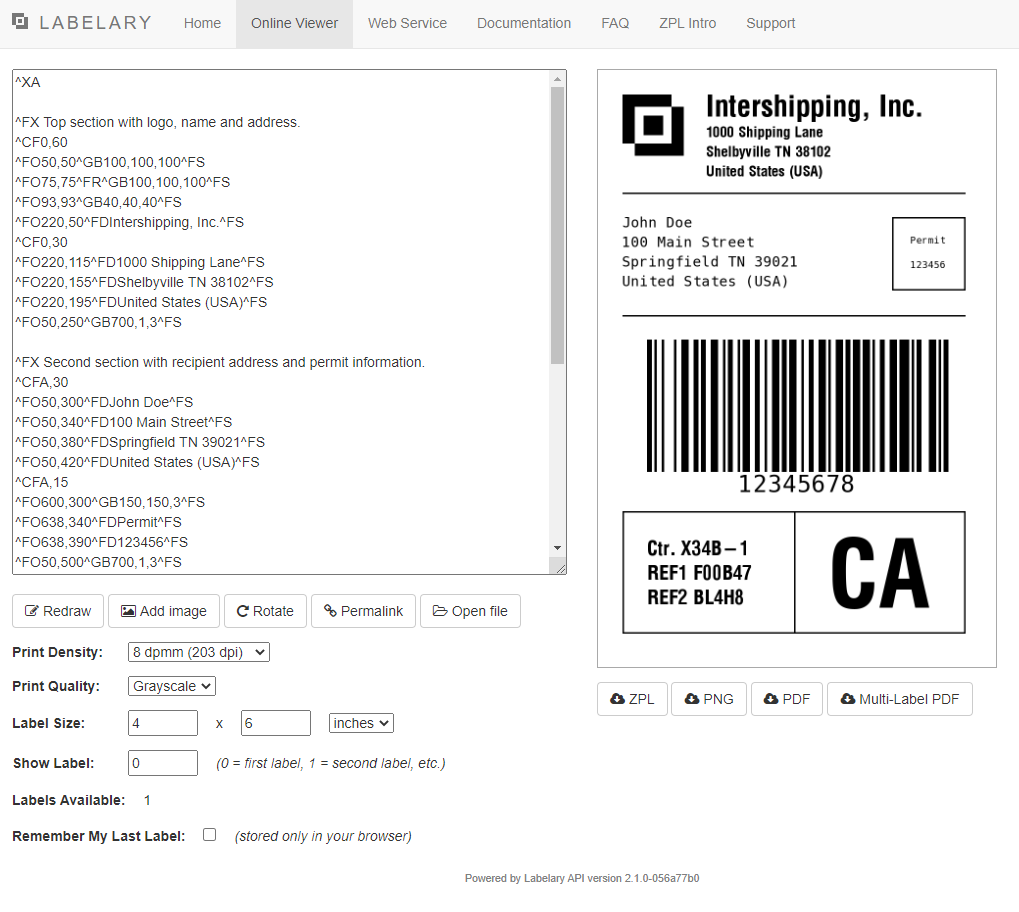
To test our template, we can select all of the text in the main box, delete it, and replace it with our template text. Then we can similarly adjust the Label Size to match our label, and then click Redraw.
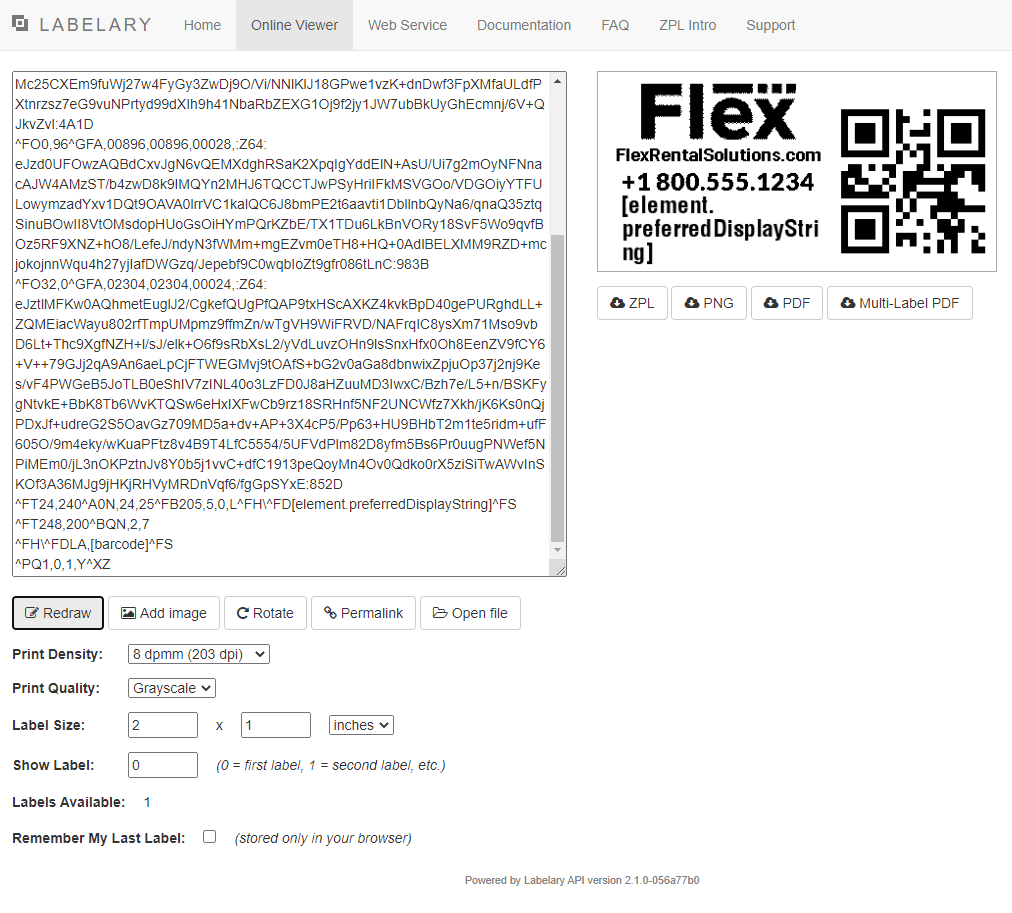
The page will refresh to show a general representation of your label. While labelary is not 100% accurate, it does tend to be a more reliable preview than what is shown in ZebraDesigner.
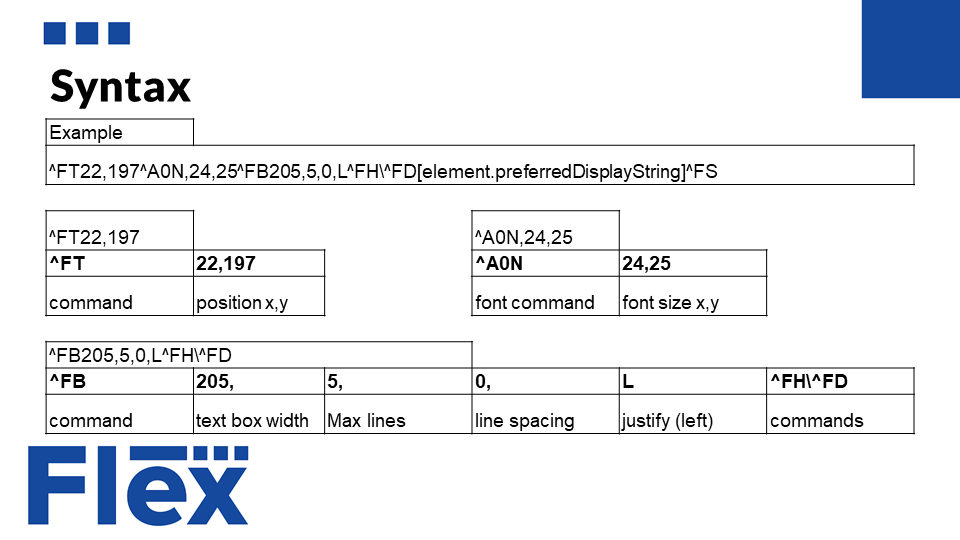
Labelary provides some notes on ZPL documentation to assist, and has basic functionality that can be used to edit a template in this manner. The below image provides some detail to how ZPL commands work- for instance, in Labelary, you can edit the two number values after a ^FT command to move that element around on the label. It is strongly recommended to reference Zebra’s ZPL Programming guide for more advanced changes.
Technical points aside, usage is nearly identical. Make the changes you would like to, click redraw to confirm visually. Copy the template text, and paste it into the Raw Printer Template you are editing, and to a text file as well, if you wish. Update the template in Flex, and do a test print. Repeat this process until you are satisfied with the result.
Furthermore, these concepts and rules can be applied such that you can adjust or edit a printer template in flex itself, bypassing the need to use ZebraDesigner or Labelary.
For Advanced Users
If you wish to custom design a template for your organization, you may find that you wish to include more specific information about the inventory item on a printed label. For this purpose, there is a broad variety of data that can be placed on an inventory item.
All tokens must be placed in a template in brackets - [ ] - refer to the Flex templates for usage.
[barcode]
The barcode token will insert the barcode number stored in flex. This includes preceding zeros, and all alphanumeric characters. It is the barcode command in the template which defines the type of barcode printed- your label printer must support printing the barcode style you wish to print. For example, most Zebra printers will print a QR style barcode. But only certain models will support the command to print a Mini QR style barcode. Our small 2D label template uses a DataMatrix style barcode instead, for better compatibility.
[element.preferredDisplayString]
This is one of two tokens which will automatically populate additional information after the Name of the inventory item. It will place the Serial Number of the item after the name. If Serial Number is not available, it will place the Stencil of the item after the name. If Stencil is not available, it will place the Barcode Number of the item after the name.
[element.name] - [model.name] - [unit.name]
See above.
[element.inventoryItem.name]
This token prints the item name only.
The following tokens will print “Null” if there is no data for the field the token relates to. Consider implementing multiple templates for Serialized, Non-Serialized, and Retail items.
[element.barcode.label] - [barcode.label]
This token prints the contents of the "Barcode Label Field" under Tracking/Logistics, set on an inventory model.
[element.shortHand]
This token prints the Short Hand name for the item, set on the Model.
[element.shortName]
This token prints the Short Name name for the item, set on the Model.
[element.stencil]
This token prints the Stencil for an item, set on the Unit.
[element.size]
This token prints the Size for the item, set on the Model.
[element.manufacturer]
This token prints the Manufacturer for the item, set on the Model.
[element.partNumber]
This token prints the Part Number for the item, set on the Model.
[element.manufacturersSerialNumber]
This token prints the Serial Number for the item, set on the Serialized Unit. [element.stencil] This token prints the Stencil for the item, set on the Serialized Unit.
Editing an EPL Label Template
- On the System Settings menu, click Raw Printer Templates.
- Double-click the template that you want to edit.
- Edit the template information.
- Name: The name of the label template.
- Code: Optional reference code.
- Supported Printers: Which printers in your system on which this label can be printed.
- Template Text: What will be printed on the label. This requires use of the EPL2 printer control language (more information below).
- Click UPDATE.
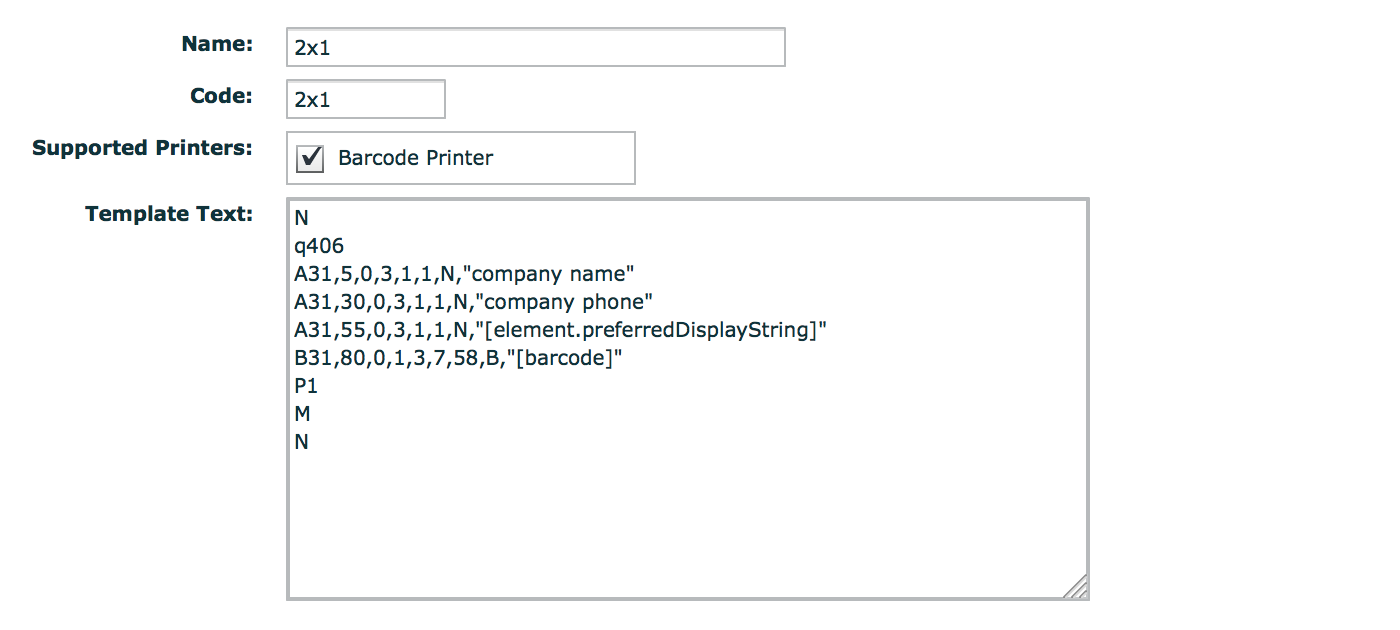
If you are editing an existing label template, you will notice a unique sequence of numbers separated by commas. This is the Eltron Programming Language (EPL2), which is a printer control language used to produce printed labels for various Zebra model printers. The EPL2 printer control language will determine certain parameters for the printed label, like font size, position, barcode type, etc. For EPL2 reference, please see the Zebra EPL Programming Guide.
See the video at the top of this page for more information about changing the look of a label template using the EPL2 printer control language.
If you are making simple text changes to your label template, then you can modify the text that appears between quotation marks. For example, your company name and phone number.
Deleting a Barcode Label Preferences & Templates
- In the Barcode Printer Preferences menu, delete all entries which correspond to the template you want to delete. Check the lines you wish to delete, then click the Trash Can Icon, then click Yes to confirm the deletion
- In the Printer Templates menu, check the lines which correspond to the template(s) you wish to delete, then click the Trash Can Icon, then click Yes to confirm the deletion