- Overview
- Changing Inventory Pricing
- Overriding Default Inventory Pricing on a Quote
- Changing an Item's Pricing Model on a Quote
Overview
Pricing can be assigned to each inventory model in your system. By default, Flex includes several common pricing models like Day Rate, Week Rate, and Hourly Rate. You can enter a different rate for each pricing model, then choose which pricing model you are using when building a Quote.
Changing Inventory Pricing
- Open the inventory model.
- Go to the Pricing tab.
- Enter a price in the Price column for each pricing model that you want this item to use. All changes are automatically saved.

You can also enter a cost in the Pricing tab for the inventory model. Keep in mind that this is not meant to be a purchase cost or replacement cost. The Cost field on the Pricing tab should be viewed as the estimated cost to you each time you send this item out. This might include the cost to pay the item off, the cost of labor to prep and send the item, etc.
What you put in the Cost field is entirely up to you. Some customers don’t use the Cost field at all, while others have a specific calculation for cost that is based on the price that they are charging. If you plan on using any of Flex’s profit/margin or job costing tools, then it is important to put something in the Cost field.
Overriding Default Inventory Pricing on a Quote
- Click the price of the line item in the Price column of the Quote.
- Enter the new price.

To reset the line item’s price to the default pricing, select the Modify icon in the right-hand Workbench Menu, then click Reset Price. If you click Reset Price without selecting any line items, then every line item on the Quote will reset to the default pricing.
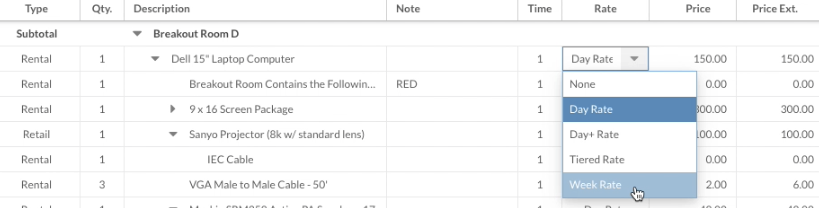
Changing an Item's Pricing Model on a Quote
- Click the pricing model name in the Rate column of the Quote.
- Choose a pricing model from the dropdown list.