- Overview
- Free Scanning Equipment Out
- Assigning Free Scanned Out Equipment to a Job
- Printing the Free Scan Out Report
Overview
Sometimes you might have to scan equipment that isn’t assigned to a job out of your warehouse. Using the free scan out feature will allow you to do this. We typically recommend always creating a job and scanning equipment out from a Pull Sheet. But the free scan out feature can be useful when you have to quickly remove something from your inventory without creating a job. The scanned items can then be assigned to a job later.
Free Scanning Equipment Out
- On the Warehouse menu, click Free Scan Out.

There are several methods for scanning equipment out:
- Use a Barcode Scanner – For serialized items, you will scan the unique barcode found on each serialized unit of the model. For non-serialized items, you will scan the model barcode, then enter the quantity that you want to scan. See Serialized vs. Non-Serialized for more information.
- Manually Enter Barcodes – You can manually enter a barcode into the barcode input box (top right corner of Flex). Like using a barcode scanner, you will manually enter unique barcodes for serialized units, and the model barcode for non-serialized items.
The scanned equipment is now removed from available inventory, but not assigned to a specific job or event.
Assigning Free Scanned Out Equipment to a Job
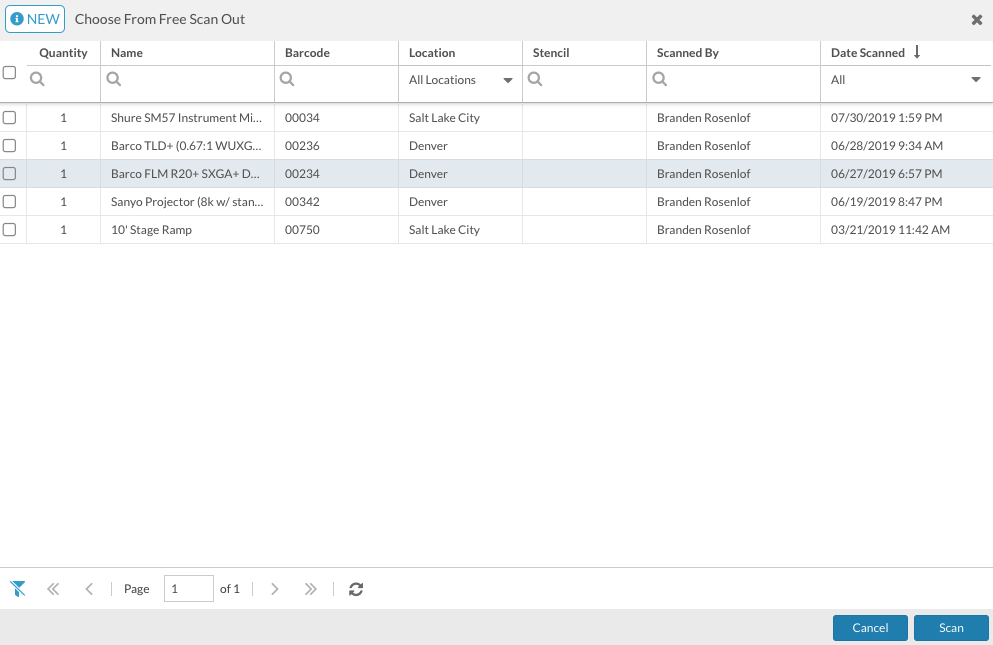
If you free scanned out some equipment and want to assign it to a job or event later, then you can use the Choose from Free Scan Out option from the prep screen of a job.
For example, say you had a customer call and they needed a projector immediately. If you didn’t have time to create a Quote or Pull Sheet for the customer, then you can free scan the projector out. Then, you can go back and create a Quote or Pull Sheet with the projector on it and assign the free scanned out project to that job.
How to assign free scanned out equipment to a job:
- When on the prep screen for a job, click the Choose From Free Scan Out icon. A new window will open within the prep screen.
- Double-click the line or select multiple lines from the free scanned out list that appears in the window.
- Click Scan.

Any barcode(s) you scan will be assigned to the manifest of the current job you are prepping. If the item was also added to the Pullsheet, the line should receive a green check mark on the Prep screen.
Printing the Free Scan Out Report
- On the the Reports tab, click Free Scan Out Report.
- Choose the report parameters.
- Click GENERATE REPORT.
The Free Scan Out report will show all items that are currently free scanned out. If no items are currently free scanned out, then the report will be blank.